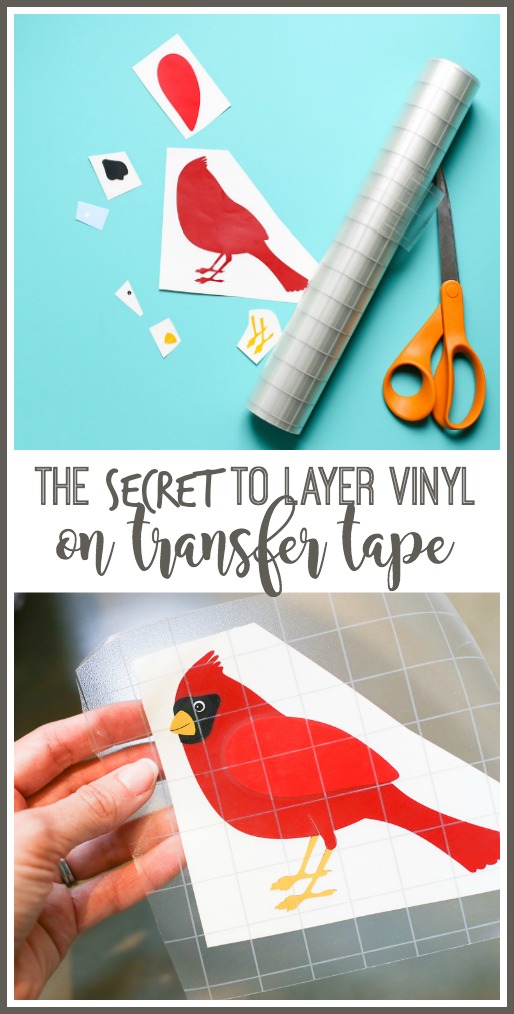
The world of car customization offers a limitless canvas for self-expression, and one of the most versatile and rewarding techniques is layering permanent vinyl. By combining multiple layers of vinyl, you can create intricate designs, add dimension, and achieve a professional-grade finish that turns your car into a rolling masterpiece.

Image: sugarbeecrafts.com
Embark on this step-by-step guide, and we’ll unveil the secrets of layering permanent vinyl like a seasoned pro. From choosing the right materials to perfecting the application process, we’ll ensure that your car decal stands out from the crowd with its vibrant hues and impeccable execution.
Step 1: Gather Your Vinyl Arsenal
The foundation of a successful vinyl project lies in selecting the appropriate materials. For car decals, permanent vinyl is your go-to choice. This durable vinyl is designed to withstand the elements and maintain its vibrant colors for years to come.
Choose a variety of colors and finishes to bring your design to life. Consider reflective vinyl for added visibility, metallic vinyl for a touch of elegance, or textured vinyl for a unique and tactile experience.
Step 2: Design Your Decal
Armed with your vinyl palette, it’s time to let your creativity flow. Design your decal using a graphics software program. Remember, simplicity often yields the most striking results. Bold fonts, clean lines, and negative space can create a powerful impact.
Step 3: Prepare Your Car Surface
A pristine surface is crucial for maximizing the adhesion and longevity of your vinyl decal. Thoroughly clean the application area with rubbing alcohol, removing any dirt, grease, or debris. Allow the surface to dry completely before proceeding.

Image: www.pinterest.co.uk
Step 4: Apply Your Base Layer
Begin by applying the largest piece of vinyl, which typically forms the background or main element of your design. Carefully remove the backing and align the vinyl with the designated area. Use a squeegee to firmly press the vinyl onto the surface, removing any air bubbles or wrinkles.
Step 5: Layer by Layer Perfection
Now comes the magic part – layering! Start by placing a small piece of vinyl over the base layer, ensuring proper alignment. Again, use a squeegee to apply firm pressure, working outward from the center to eliminate air pockets.
Repeat this process for each additional layer, taking care to overlap the edges and maintain uniform pressure. The secret to seamless layering lies in precise alignment and meticulous attention to detail.
Step 6: Intricate Designs with Ease
Don’t be afraid to experiment with intricate designs involving multiple layers. By carefully overlapping and aligning the vinyl pieces, you can create depth, highlights, and eye-catching effects that elevate your decal from ordinary to extraordinary.
Step 7: Compress the Layers for a Strong Bond
Once all the layers are in place, it’s time to bond them into a cohesive unit. Use a heat gun or a hair dryer on a low heat setting and gently apply heat to the vinyl surface. The heat will activate the adhesive and ensure a strong, long-lasting bond between the layers.
Step 8: Seal Your Masterpiece
To protect your vinyl decal from fading, discoloration, and minor scratches, apply a clear protective layer. Choose a polyurethane or epoxy spray specifically designed for vinyl. This final touch will safeguard your decal and preserve its vibrant appearance for seasons to come.
Step 9: Let Your Car Decal Shine
Congratulations! You’ve successfully layered permanent vinyl and created a stunning car decal that reflects your unique style. Take a moment to admire your handiwork, knowing that you’ve added a touch of personalization that will turn heads wherever you go.
How To Layer Permanent Vinyl For Car Decal
Additional Tips for Layering Success:
- Always use a sharp blade to ensure clean cuts and precise alignment.
- Practice on a scrap piece of vinyl before applying it to your car.
- Use a ruler or measuring tape for accurate placement and even spacing.
- If bubbles occur, carefully lift the vinyl and reapply it, pressing out the air.
- Avoid touching the adhesive side of the vinyl to prevent contamination or reduced adhesion.
By embracing these tips and techniques, you’ll become a master of permanent vinyl layering, transforming your car into a rolling statement of your individuality. So, get ready to roll up your sleeves, ignite your creativity, and unleash your inner vinyl artist!